Here’s a short guide on how to create a Shopify App with Laravel framework.
You can register on Shopify as a partner for free here: https://www.shopify.com/partners
After you have registered, you will be able to create a development store where we will be able to install and test our Shopify Application.
It would be good practice to create some products there and perhaps a few clients so will have something to play around with developing your Laravel Shopify App.
Creating a new Shopify App.
On the Shopify Partner dashboard, you will be able to create a new application.
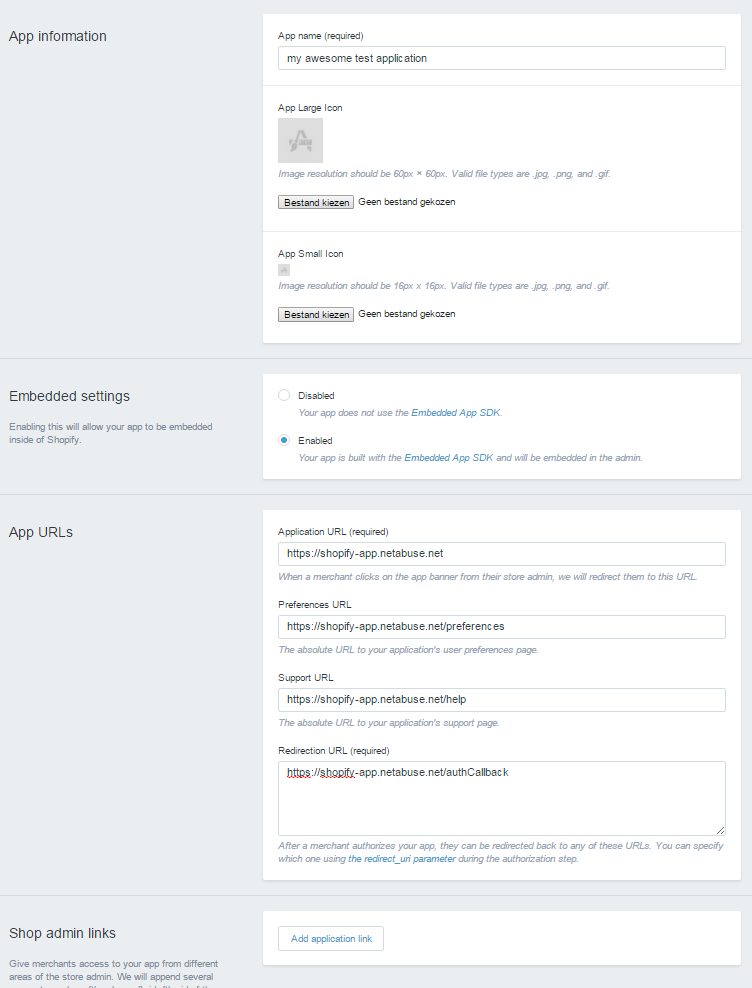
Creating this application, it’s important to know that it’s best practice to secure your application with SSL.
These are the parameters I will be using for my test application:
Creating a Shopify application
The important parameter here is the required Redirection URL.
We will create a route to this function that does the oAuth callback in Laravel later.
Once you have created your application, you will get your API key and secret.
We will need these to add to our Laravel application.
Creating a new Laravel application.
The first step would be to create a new Laravel application.
Once that’s done, we will be using the following package for Laravel to communicate with the Shopify API:
https://github.com/joshrps/laravel-shopify-API-wrapper
Communicating with Shopify
The next step will be to setup our Laravel application so we can communicate with Shopify.
The first step here is to create a controller. I named mine ShopifyController to keep it simple.
In this controller, we will begin with creating three functions to authenticate our application.
The first function we will create is called “access” in our ShopifyController:

When users would click to install our Shopify Application from the Shopify Application listing, this will handle initiate the oAuth process.
If they are successfully logged in, as you can see in the code, they will receive the shopify.index view. You can go ahead and create an empty view for this which you can later customize.
For now let’s continue with the basics first.
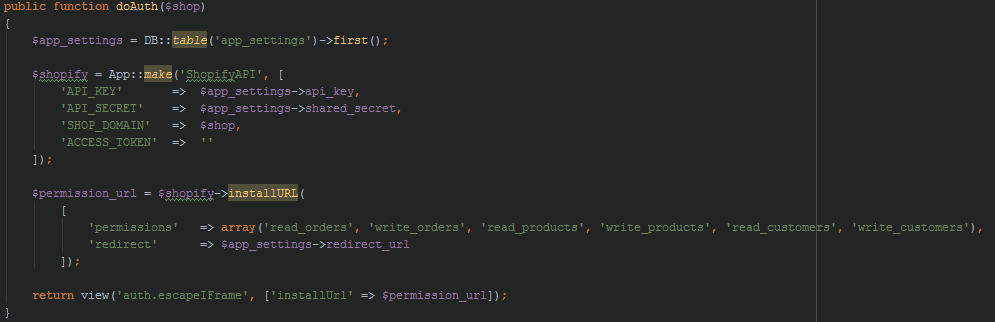
As you can see in the code, if there is an access token available in the current session, we will connect to Shopify with our API credentials and pull some information about the shop where the application is installed. If the application has not been installed or authenticated to use our application, we will call the doAuth function which you can find below:
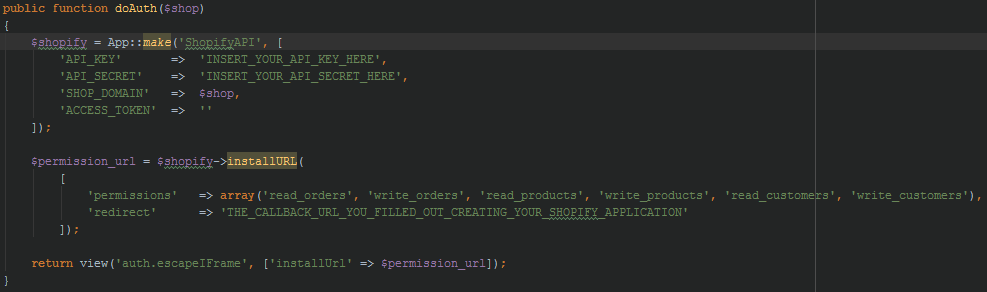
You will notice that this function will call a “escapeIFrame” view. This is a very simple view that will redirect us to the callback page.
Right now it’s not the most elegant solution, but it’s for testing purposes 🙂
This escapeIFrame view contains just a meta redirect tag:
<meta http-equiv="refresh" content="1; url={{ $installUrl }}">
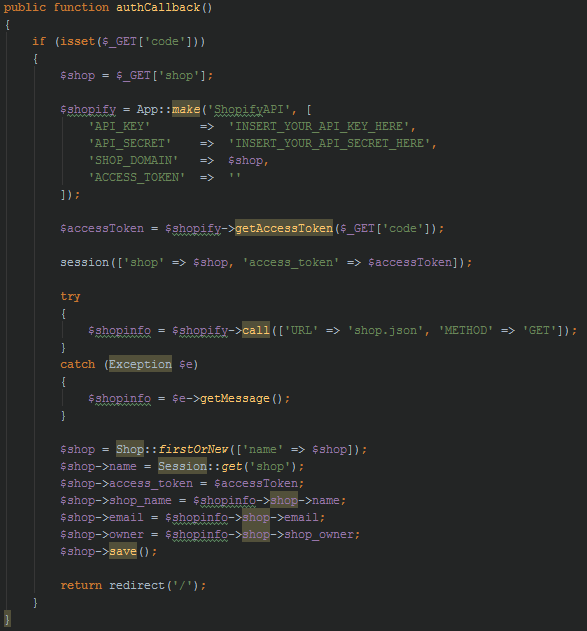
In the next function, we will handle the callback from the oAuth. When this happens, we will receive an access token. I prefer to store some information about the shop that is using our app.
To do this, I created a new migration for a “shops” table and created a “Shop” model for this as well. Below you will find the migration for my shops table.
Schema::create('shops', function (Blueprint $table) {
    $table->increments('id');
    $table->string('name');
    $table->string('access_token');
    $table->string('shop_name');
    $table->string('email');
    $table->string('owner');
    $table->timestamps();
});
The model can be empty for now. It’s up to you to later make some changes in there if you decide to store data this way and plan on doing something with it.
After setting up the migration and the model, we can create our authCallback function in our ShopifyController:
That should do it for the basics for the app. What remains now, is to create our routes.
In your routes file, you should have this:
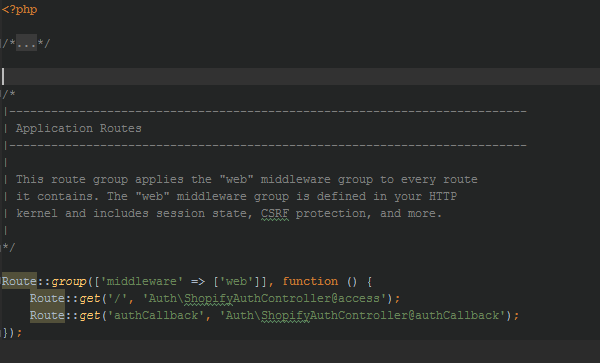
Notice that since I’m using Laravel 5.2 at the time, that I have put the routes to our controller in the web middleware group section.
Testing
After this is done, you can go ahead and deploy your application to your server which you have defined creating your Shopify App, run the migrations and you should be good to go.
Of course since your app is not published yet in the Shopify App directory, you will have to call or trigger the installation manually.
When someone would click install from the Shopify App directory, the following url would be called:
/?shop=mydevshop.myshopify.com
where “mydevshop.myshopify.com” would be the URL for your development shop.
If everything went well, Shopify will ask you for your permission to use this app.
This should cover the basics for setting up a Shopify App. From here on, I suggest reading through the Shopify API documentation and create your actual application.
Hope this was helpful and feel free to ask any questions if anything is not clear or you need some help getting it working 🙂